How to implement RazorPay Payment Gateway with React vite App and Node.js | Mysql
- Posted on January 2, 2025
- Technology
- By MmantraTech
- 925 Views
Hi Guys, In this Blog, I will explain you through how to implement Razorpay into your React Vite app using a Node.js backend and MySQL database. I will break down the blog into two parts that is :
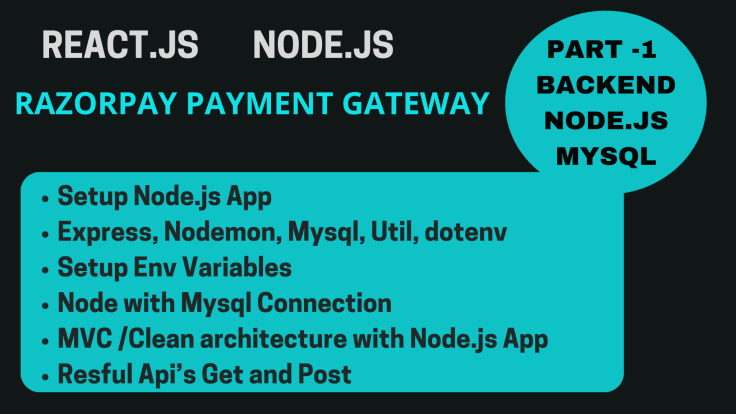
Frontend - Setup
Step 1: Set Up Your React Vite App
1. Initialize a React Vite Project:
2. npm create vite@latest razor-pay-front
3. cd razor-pay-front
4. npm install
Structure

index.html
<!doctype html>
<html lang="en">
  <head>
    <meta charset="UTF-8" />
    <link rel="icon" type="image/svg+xml" href="/vite.svg" />
    <meta name="viewport" content="width=device-width, initial-scale=1.0" />
    <title>Vite + React</title>
    <script src="https://checkout.razorpay.com/v1/checkout.js"></script>
  </head>
  <body>
    <div id="root"></div>
    <script type="module" src="/src/main.jsx"></script>
  </body>
</html>
App.jsx
import { useState } from 'react'
import reactLogo from './assets/react.svg'
import viteLogo from '/vite.svg'
import './App.css'
import { Header } from './components/Header'
import Home from './components/Home'
import Footer from './components/Footer'

function App() {
  const [count, setCount] = useState(0)

  return (
    <>
    <Header/>
    <Home/>
    <Footer/>

    </>
  )
}

export default App
home.jsx
import React, { useState } from 'react';

const Home = () => {


    const RAZORPAY_KEY_ID = import.meta.env.RAZORPAY_ID;
  const [formData, setFormData] = useState({
    name: '',
    amount: '',
    mobile: '',
    email: '',
  });

  const handleChange = (e) => {
    const { name, value } = e.target;
    setFormData({ ...formData, [name]: value });
  };

  const handleSubmit = async(e) => {
    e.preventDefault();


    try {
      // Make the API call to backend
      const response = await fetch("http://localhost:3009/api/createOrder", {
        method: "POST",
        headers: {
          "Content-Type": "application/json",
        },
        body: JSON.stringify({ amount: 10*100 }),
      });

      const order = await response.json();
      console.log("Order response>>",order)
    // add option for the payment gateway it can be dynamic if you want
    // we can use prop drilling to make it dynamic
      const options = {
        key: RAZORPAY_KEY_ID,
        amount: order.amount,
        currency: order.currency,
        name: "Tech", // Add company details
        description: "Payment Testing", // Add order details
        order_id: order.id,
        // this is make function which will verify the payment
        // after making the payment
        handler: async (response) => {
          try {
            await fetch("http://localhost:3009/api/verify-payment", {
              method: "POST",
              headers: {
                "Content-Type": "application/json",
              },

              body: JSON.stringify({
                razorpay_order_id: response.razorpay_order_id,
                razorpay_payment_id: response.razorpay_payment_id,
                razorpay_signature: response.razorpay_signature,
              }),
            });
            // Add onPaymentSuccessfull function here
            alert("Payment successful!");
          } catch (err) {
            // Add onPaymentUnSuccessfull function here
            alert("Payment failed: " + err.message);
          }
        },
        prefill: {
          name: "demouser", // add customer details
          email: "demouser@example.com", // add customer details
          contact: "1111111111", // add customer details
        },
        notes: {
          address: "Razorpay",
        },
        theme: {
    // you can change the gateway color from here according to your
    // application theme
          color: "#3399cc",
        },
      };
      const rzp = new window.Razorpay(options);
      rzp.open();
      // this will open razorpay window for take the payment in the frontend
      // under the hood it use inbuild javascript windows api

    } catch (err) {
      alert("Error creating order: " + err.message);
    }

    // console.log('Form Submitted:', formData);
    // alert('Payment submitted successfully!');
  };

  return (
    <main style={{ padding: '10px' }}>
      <form onSubmit={handleSubmit} style={{ maxWidth: '400px', margin: '0 auto' }}>
        <div style={{ marginBottom: '10px' }}>
          <label>Name:</label>
          <input
            type="text"
            name="name"
            value={formData.name}
            onChange={handleChange}
            style={{ width: '100%', padding: '8px', marginTop: '5px' }}
            required
          />
        </div>
        <div style={{ marginBottom: '10px' }}>
          <label>Amount:</label>
          <input
            type="number"
            name="amount"
            value={formData.amount}
            onChange={handleChange}
            style={{ width: '100%', padding: '8px', marginTop: '5px' }}
            required
          />
        </div>
        <div style={{ marginBottom: '10px' }}>
          <label>Mobile:</label>
          <input
            type="tel"
            name="mobile"
            value={formData.mobile}
            onChange={handleChange}
            style={{ width: '100%', padding: '8px', marginTop: '5px' }}
            required
          />
        </div>
        <div style={{ marginBottom: '10px' }}>
          <label>Email:</label>
          <input
            type="email"
            name="email"
            value={formData.email}
            onChange={handleChange}
            style={{ width: '100%', padding: '8px', marginTop: '5px' }}
            required
          />
        </div>
        <button type="submit" style={{ padding: '10px 20px', background: '#007bff', color: '#fff', border: 'none' }}>
          Submit
        </button>
      </form>
    </main>
  );
};

export default Home;
header.jsx
import React from 'react'

export const Header = () => {
  return (
    <header style={{ fontSize:'5px', padding: '10px', background: '#333', color: '#fff' }}>
    <h1>Razor payment Gateway Integration with React</h1>
  </header>
  )
}
footer.jsx
import React from 'react';
const Footer = () => {
return (
<footer style={{ padding: '2px', background: '#333', color: '#fff', textAlign: 'center' }}>
<p>© 2024 React Vite App. All rights reserved.</p>
</footer>
);
};
export default Footer;
Backend
Step 2: Set Up Your Node.js Backend
1. Initialize Your Node.js App:
2. mkdir backend
3. cd backend
4. npm init -y
5. npm install express body-parser cors mysql2 dotenv util razorpay

index.js
// const express = require("express");
import express from "express"
import dotenv from "dotenv"
import cors from "cors"
const app= express();
app.use(cors())
app.use(express.json());

dotenv.config();
const PORT =3009;

import  usersroutes  from "./app/routes/api.js";

app.use("/api",usersroutes);
app.listen(PORT,()=>{

   console.log(`Server is running at http://localhost:${PORT}`);

});
route/api.js
import express from "express";
import crypto from 'crypto'; // For ES Modules
import shortid from "shortid";

const router = express.Router();
 import Razorpay from 'razorpay';

const razorpay = new Razorpay({
    key_id: 'rzp_test',
    key_secret: 'M5',
  });

router.get("/getUsers",(req,res)=>{

    res.json({msg:"ok this is routing get "});


});

router.post('/createOrder', async (req, res) => {
    try {
      let amount = req.body.amount;
      const options = {
        amount: amount, // amount in the smallest currency unit
        currency: 'INR',
        receipt: shortid.generate(),
 notes: {
            // These notes will be added to your transaction. So you can search it within their dashboard.
            // Also, it's included in webhooks as well. So you can automate it.
            paymentFor: "testingDemo",
            userId: "100",
            productId: 'P100'
        }
      };

      const order = await razorpay.orders.create(options);
      res.status(200).json(order);
    } catch (err) {
      res.status(700).json({ error: err });
    }
  });


  router.post('/verifyPayment', async (req, res) => {
    try {
      const { razorpay_order_id, razorpay_payment_id, razorpay_signature } = req.body;

      const sign = razorpay_order_id + '|' + razorpay_payment_id;
      const expectedSignature = crypto.createHmac('sha256', process.env.RAZORPAY_API_SECRET)
                              .update(sign.toString())
                              .digest('hex');
  const isAuthentic = expectedSignature === razorpay_signature;


      if (isAuthentic ) {
        res.status(200).json({ message: 'success' });
      } else {
        res.status(400).json({ error: 'failed' });
      }
    } catch (err) {
      res.status(500).json({ error: err.message });
    }
  });

export default router;
config/db.js
const mysql = require('mysql');

const connection = mysql.createConnection({
    host: process.env.HOST,
    user: process.env.USER,
    password: process.env.PASSWORD,
    database: process.env.DATABASE,
  });

  connection.connect((err)=>{

    if(err)
    {
        throw err;

    }
    else {
        console.log("Database Connected successfully")
    }


  });

  module.exports = connection;


Write a Response